Mission Geometry: Draw Once, Fly Anywhere
Draw the areas you fly often — project sites, patrol lines, inspection zones — save them once, and drop them into any mission with a single click.
If you fly the same farm, the same substation, or the same stretch of transmission line more than once, you have almost certainly redrawn its boundary from scratch every single time. It’s tedious, and worse, it’s inconsistent — the polygon you draw on Tuesday is never quite the polygon you drew last month.
Geometry fixes that. Draw a shape once, save it to a reusable library, and import it into any mission in a single click — on the web app or on your phone in the field.
Where to find it
Geometry is open to all users today, including free accounts.
- Web — Sidebar → Configurations → Geometries
- Mobile — inside any mission’s Drawing Tools, tap Import
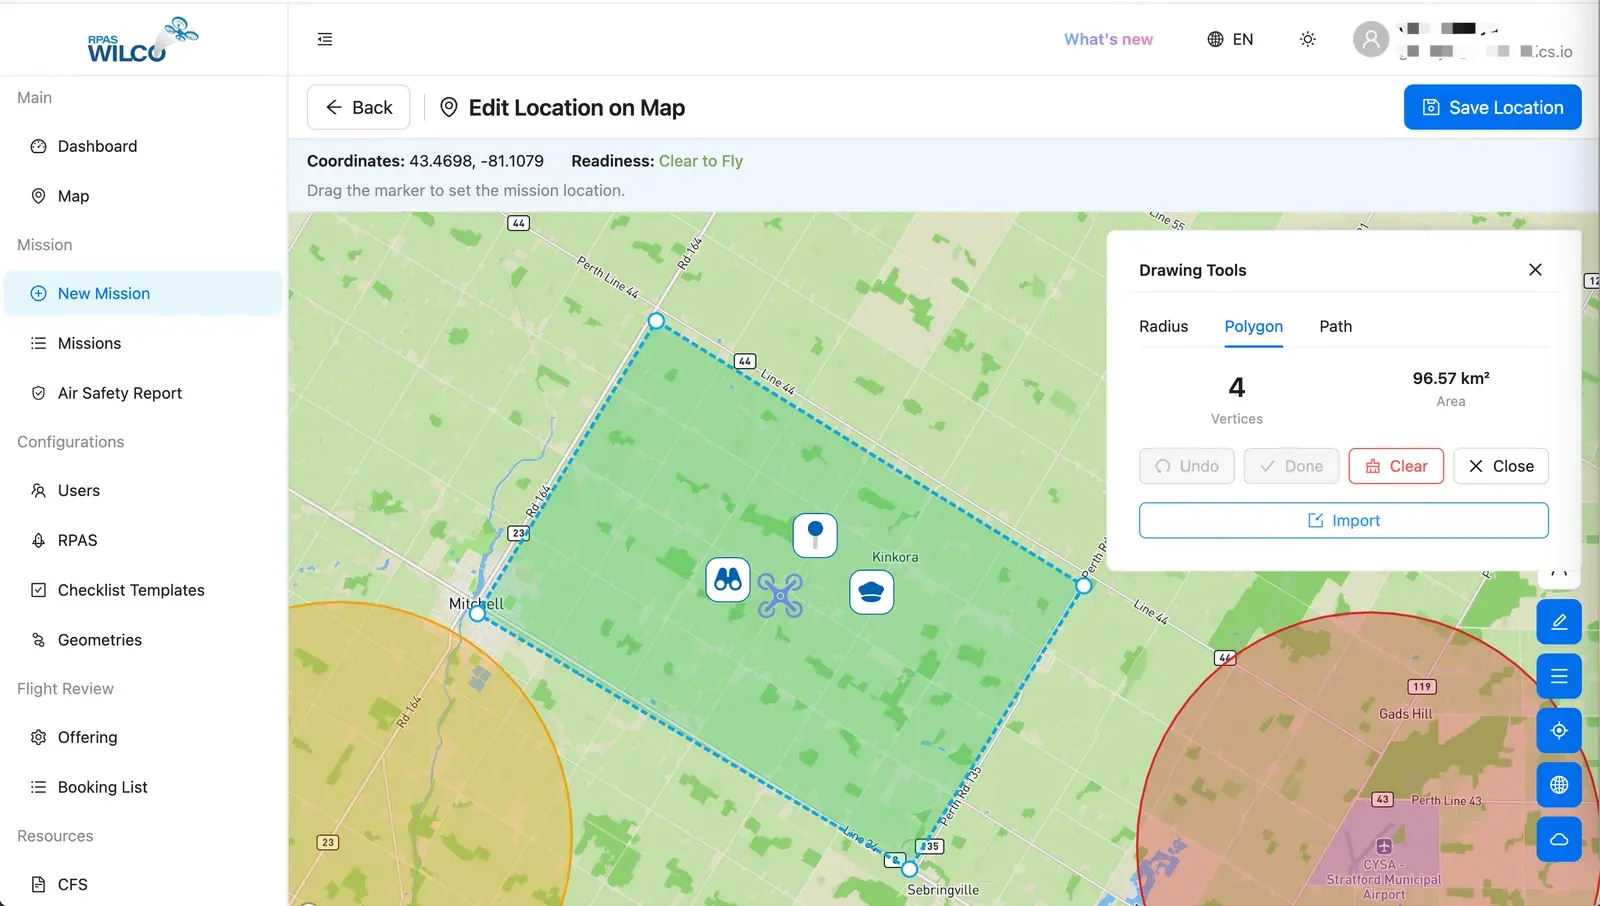
On web. Geometries lives under Configurations; draw with the Drawing Tools panel.
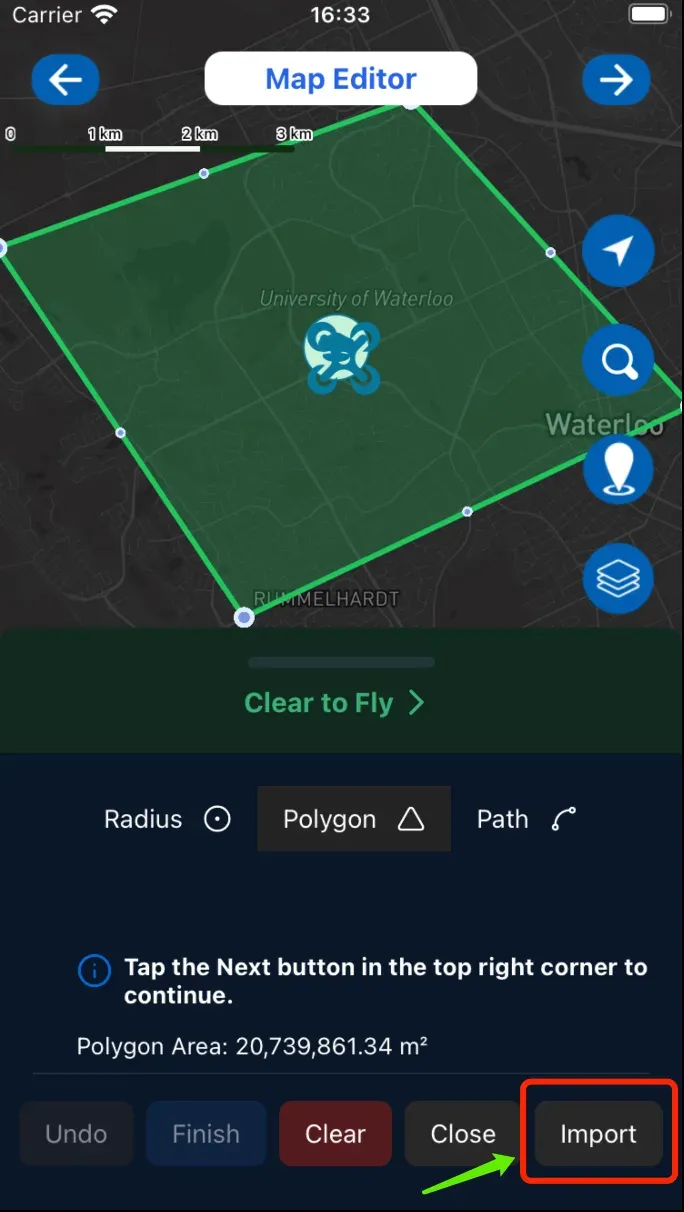
On mobile. Draw or import a shape inside the mission Map Editor.
Three clicks to reuse
- + New Geometry → click points on the map → Save
- Open any mission → Drawing Tools → Import → pick your shape
- Done — your coordinates are in the mission, ready to fly
That’s the whole loop. The saved shape carries its exact coordinates, so the third flight over a site covers precisely the same ground as the first.
Two shapes to choose from
Polygon — closed areas. Sites, farms, and boundaries: anything you fly as an enclosed area.
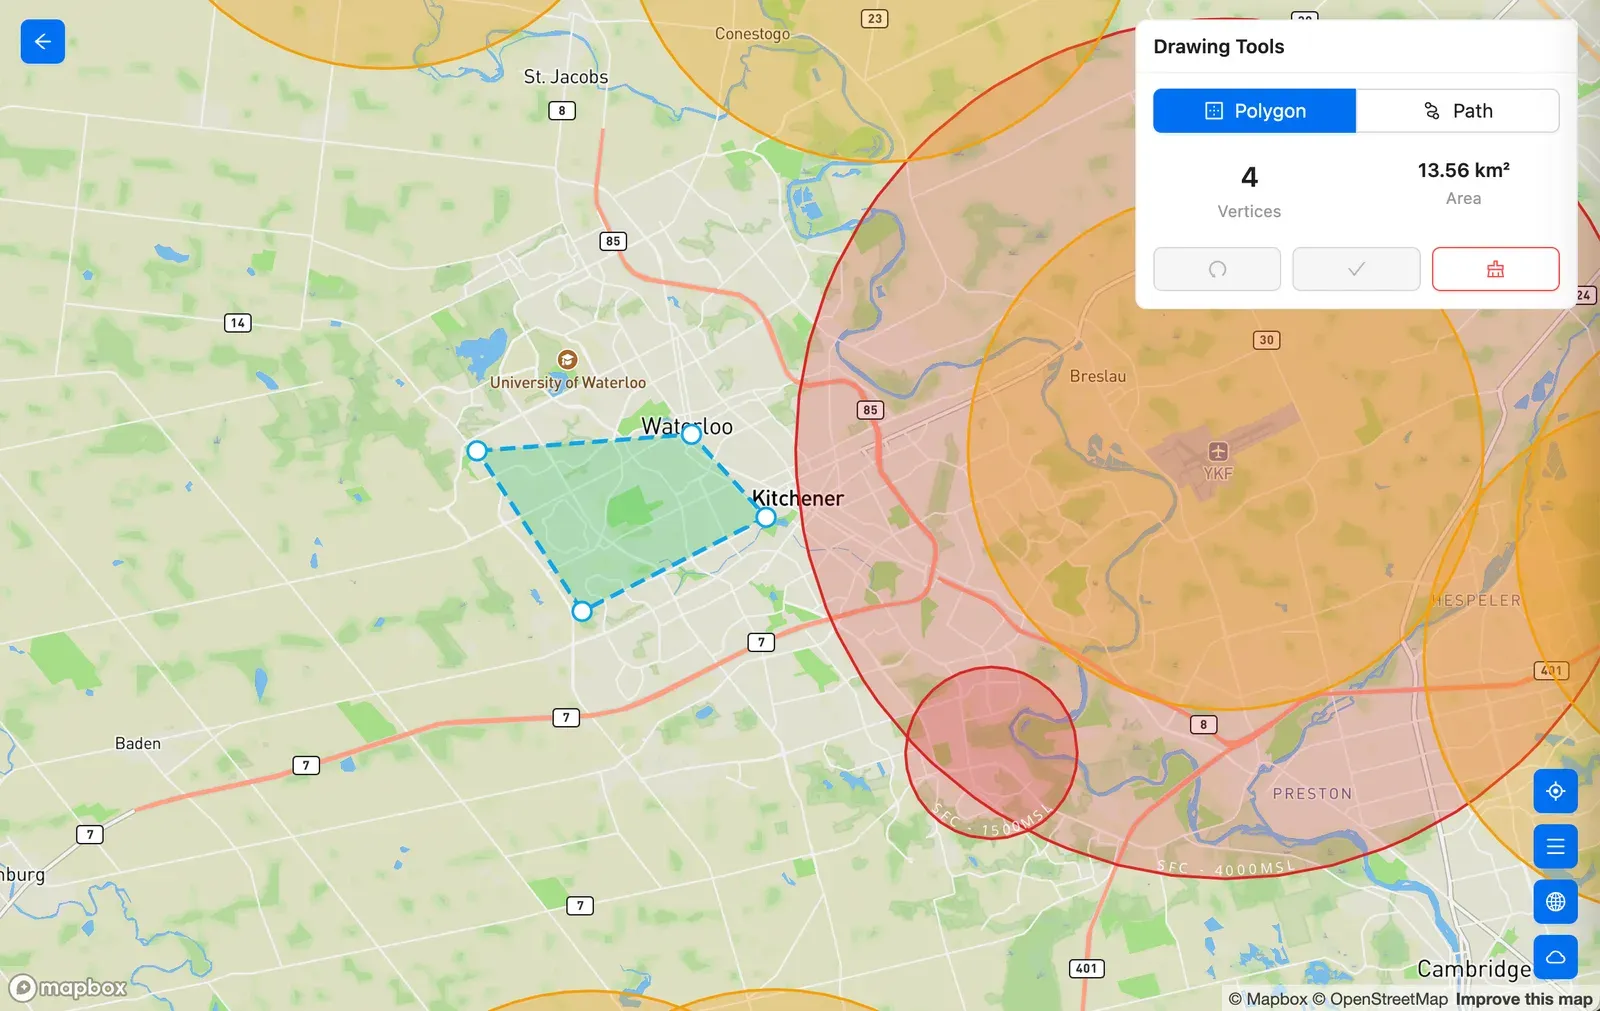
Polygon. A closed area drawn vertex by vertex.
Path — linear routes. Rivers, power lines, and pipelines, with an automatic 40 m corridor buffer rendered around the line. Draw the centreline and the corridor generates itself.
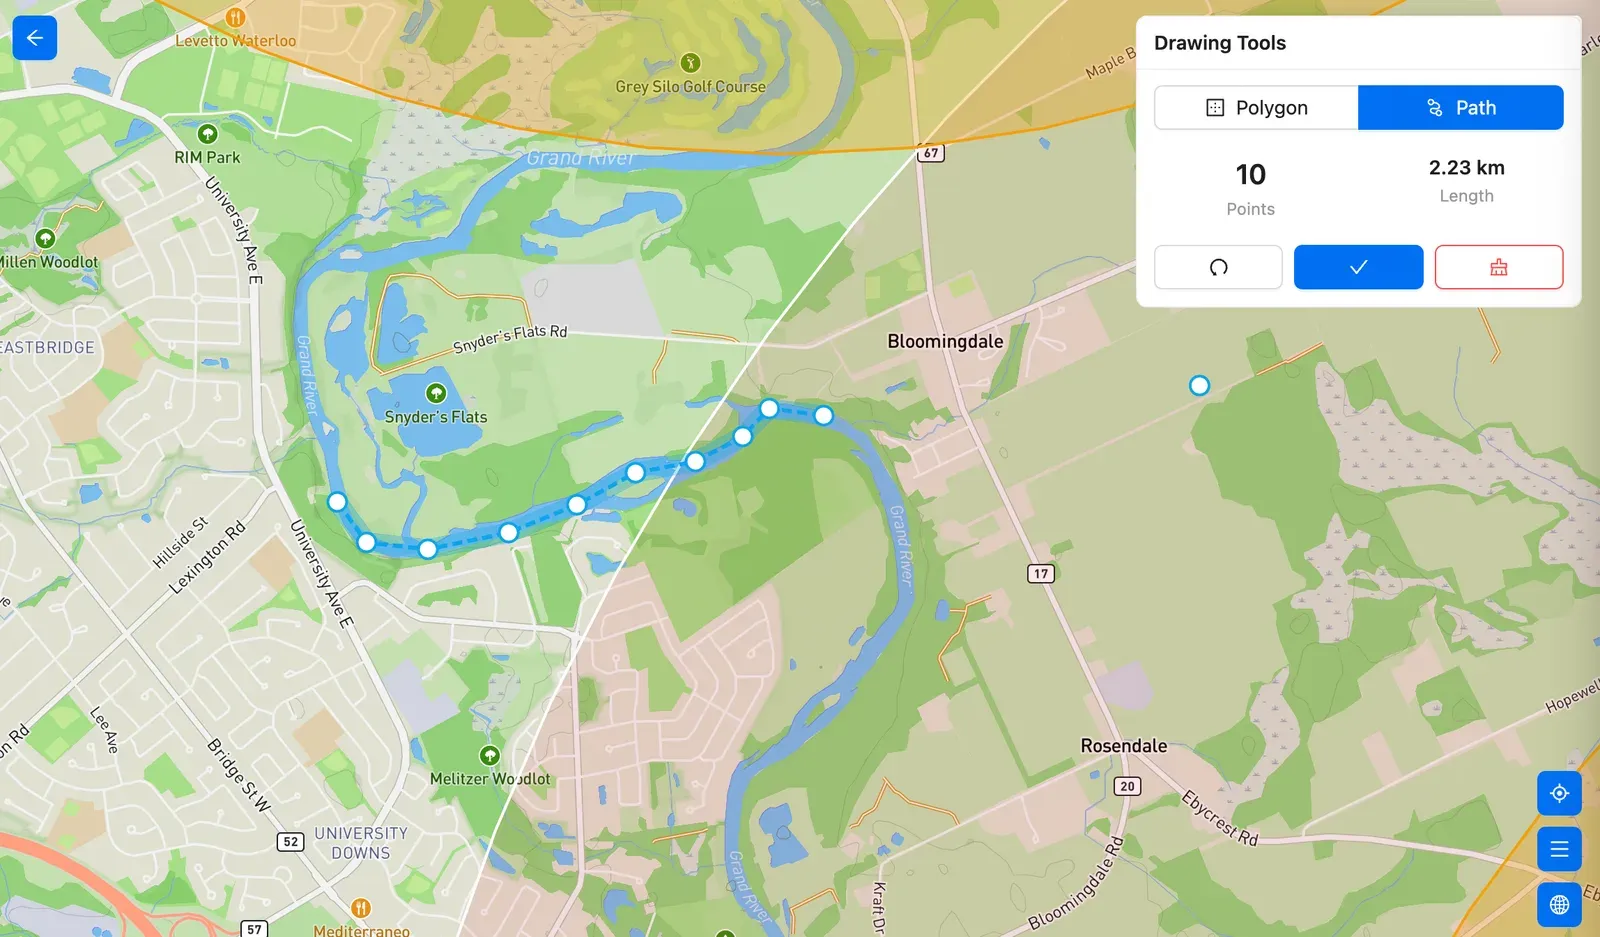
Path. A route wrapped in its automatic 40 m corridor buffer.
Trace an airspace boundary straight off the chart
This is the part experienced pilots tend to appreciate most. Open the Drawing Tools legend, toggle VNC (or VTA) on, and drop vertices along the airspace border as it appears on the chart.
Your saved polygon carries that boundary exactly — no eyeballing a shape against a chart in another tab, no re-projection error creeping in between the two.
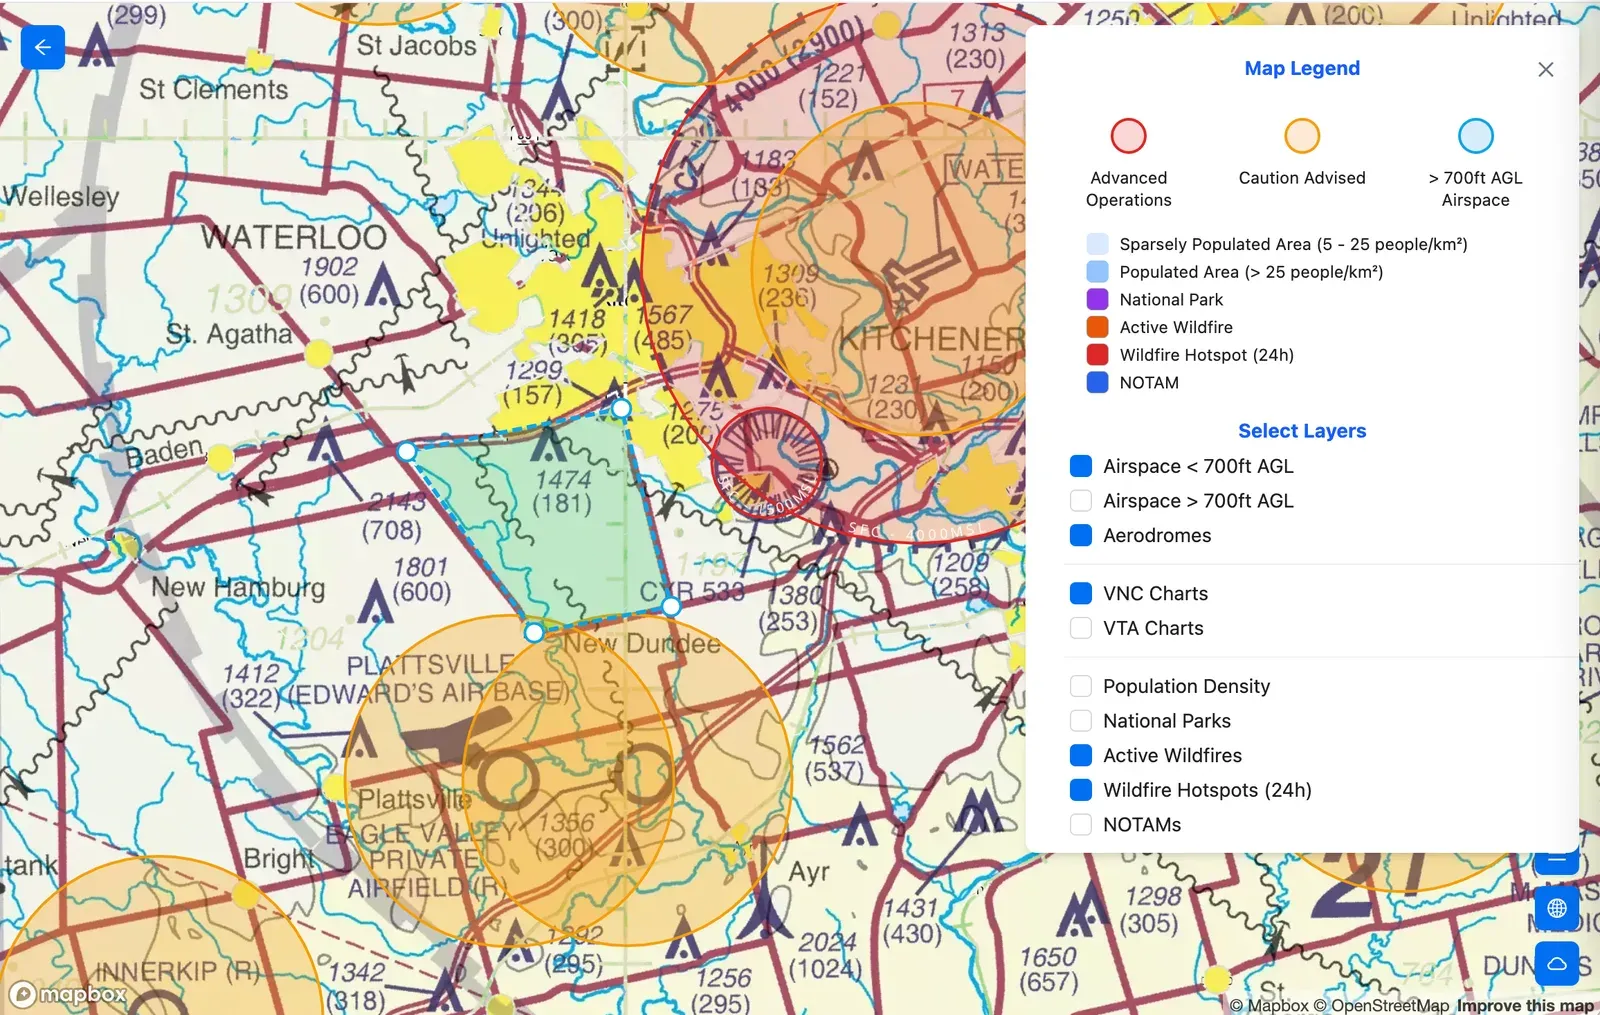
Chart-accurate. Trace the boundary directly on the VNC layer and save it.
If you’re not yet familiar with reading Canadian aeronautical charts inside the platform, the free drone airspace map covers what each layer shows and where the underlying NAV CANADA data comes from.
Draw against real-world context
You can turn map layers on while you draw, so a corridor follows what’s actually on the ground rather than what you remember being there. Available layers:
- VNC and VTA aeronautical charts
- Airspace below 700 ft AGL and above 700 ft AGL
- Aerodromes
- Active Wildfires and Wildfire Hotspots (24 h)
- NOTAMs
- Population Density
- National Parks
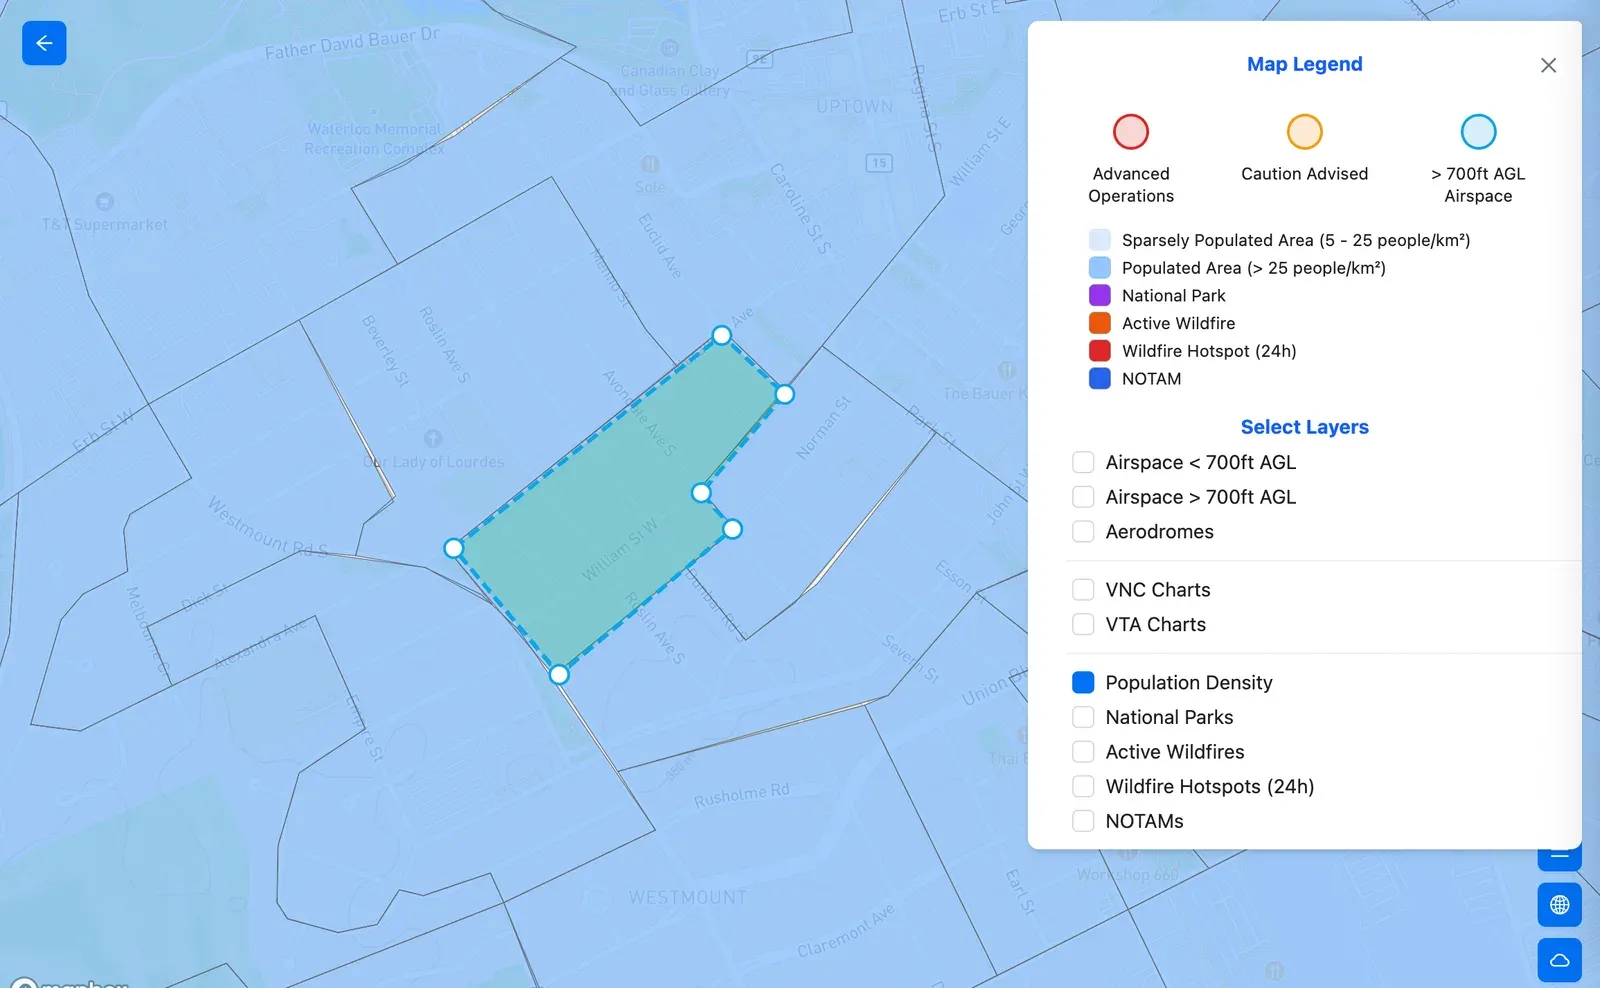
Context on tap. Turn on the layers you need, then draw against them.
The NOTAM layer is worth switching on before you commit a shape — a permanent geometry drawn through an area with recurring restrictions will keep tripping you up on every future mission. Our guide to decoding NOTAMs explains what you’re looking at.
Bring a shape in from GIS
Already have the boundary as a file? Hit Upload on the Geometries list page and drop in a KML or GeoJSON — from a partner, a survey crew, or your own GIS tooling. The shape lands in your library as a Polygon, ready to reuse like any other.
One limitation to know up front: if your KML contains several shapes, only the first is imported. Split multi-shape files and upload them one at a time.
On mobile
Every shape you save on web shows up on mobile automatically. In any mission, open Drawing Tools → the Polygon or Path tab → Import → pick from your library.
Creating, editing, and deleting stay on web for now — mobile is read-only against the library. In practice that suits how most crews work: shapes get set up at the desk, then used in the field.
Where it fits in your pre-flight
Geometry handles where you’re flying. It pairs naturally with the rest of the pre-flight stack:
- Your site survey documents the CARs 901.27 assessment for that location
- The weather panel tells you whether conditions at your flight altitude are workable
- Your saved geometry supplies the boundary itself, identical on every repeat visit
For recurring sites, that combination turns a twenty-minute planning session into a couple of minutes.
Frequently asked questions
Do I need a paid plan to use Geometry? No — it’s open to all users for now, including free accounts. Access may change in the future.
Can I edit a saved shape? Not yet. Delete and redraw for now; edit support is on the roadmap.
Can I share shapes with teammates? Each shape is per-user today. Organisation-level sharing is a live product request.
My KML has several shapes — what happens? Only the first is imported. Split them into separate files and upload one at a time.
The bottom line
If you fly the same ground repeatedly, drawing it repeatedly is wasted effort — and a quiet source of inconsistency between flights. Save the shape once, import it in a click, and every mission over that site covers exactly the same area.
For the full click-by-click walkthrough on both platforms, see the Geometry guides in the Help Centre.